Client Served Canned Report
Introduction
The Client Served Report is a built-in, canned report available within Community Services (formerly ServicePoint) that looks at Service Transactions recorded in HMIS for a particular project. This report does not look at Entry/Exit records.
Report Run Steps
Step 1. Open the Report
- Select Reports from the navigation menu on the left side of the screen to open the Report Dashboard.

- Select Client Served Report from the Provider Reports section.

Step 2. Build the Report
- On the Report Options screen, fill out the following prompts:
- Reporting Group: (optional) If you're running the report for a reporting group, you can select it here. If not, just skip down to Provider and select the provider for which you're running the report.
- Provider: Select the provider that created the service transactions. If pulling this report by a Reporting Group, skip down to the next prompt and leave this one null.
- Keep “This provider only” radio button selected.
- Services:
- Services Provided (other than shelter or referred services): This is the default selection and typically can be left as is unless the user is looking specifically at Shelter Stays or Referrals.
- Shelter Stays: Select Shelter Stays if your project uses ShelterPoint and you want to pull a report on Shelter Stays.
- Referrals Served by Selected Provider(s): Select Referrals Served by Selected Provider to see clients served through referrals recorded on the Service Transactions tab.
- Grouping: Do not change this, keep as defaulted to Clients Receiving Services as a Family.
- Funding Source: (optional) Select the correct fund that is associated with the project that this report is for if applicable.
- Service Code: (optional) Typically, this will be left blank, but you can select specific services if you'd like the report to show only those clients who received a specific type of service.
- Served Date Range: Enter the reporting period for which you want to review services entered.
- Served Before Date Range (Old Client Count): Do not enter anything here.
- Treat Open-Ended Services/Referrals as 1-day Services: Leave as “Yes”
- Legal Adult Age: Leave at 18
- Click on Build Report when all of the prompts have been filled out.
Step 3. Review the Report Results
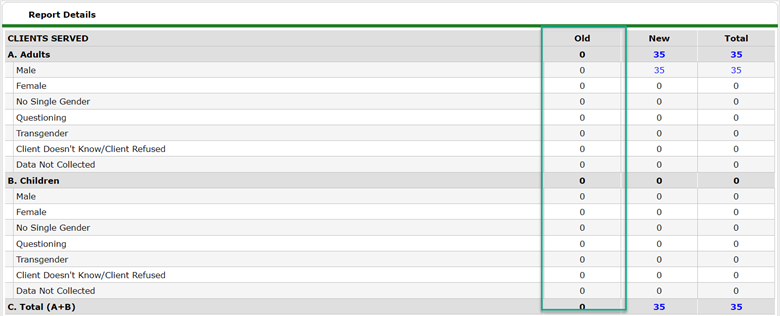
- The report’s results will appear under Report Details. You can see data pulled by gender, race, and ethnicity.
- The first three tables of this report are:
- Clients Served
- Family Members Served
- Singles Served
- Within these tables, you can understand the gender breakdown of those served.
- As we advised you to leave the Served Before Date Range (Old Client Count) report prompt null, nothing will appear in the Old columns of these tables.

- At the bottom of this report, you can see the Service Count and Service Type pulled into the report based on your prompts. Here are a few notes about which services will appear here:
- Services will appear here even if a Funding Source and Amount fields within the Service Transactions tab on a client record are null.
- If a project completes the Funding Source and Amount fields on client records within the Service Transactions tab, the Funding Source, Total Cost, and Average Cost columns will populate.
- The report prompts of this report allow you to filter data on a particular Service Code and/or Funding Source.


Step 4. Download the Report
- Click on Print to download a PDF version of the report.

- Follow the prompts to select “Save as PDF”.
- Click on Save.
