How to create a program enrollment
Date Created: June 23, 2025 | Date Update: January 7th, 2026
What this is
This is an overview of the steps to create a program enrollment.
What you need to know
This article is meant for projects using the intake button in the Client Workspace to create an entry assessment and NOT for Coordinated Entry or Diversion projects.
Follow these steps
- Follow the instructions in Searching for a Client to locate an existing client.
- Go to the Client Workspace and click the Intake menu to start the Client Enrollment process.

- If you found the Client during your search, click Use the Current Client. If you didn’t find them, click Add a New Client and follow the instructions in Adding a New Client article to create a new client record.
- Review and update the Basic Client Information (if needed). Check and update the Family Information, then click Save & Close.
Tip: If you need to add a family member, follow the steps in the "Add a Family Member" article.
- Choose the project from the drop-down menu on the Program Enrollment form.

If you don’t see the project, make sure you’re in the right workgroup and organization.
- If applicable, select any State or Local Grants tied to your client's enrollment

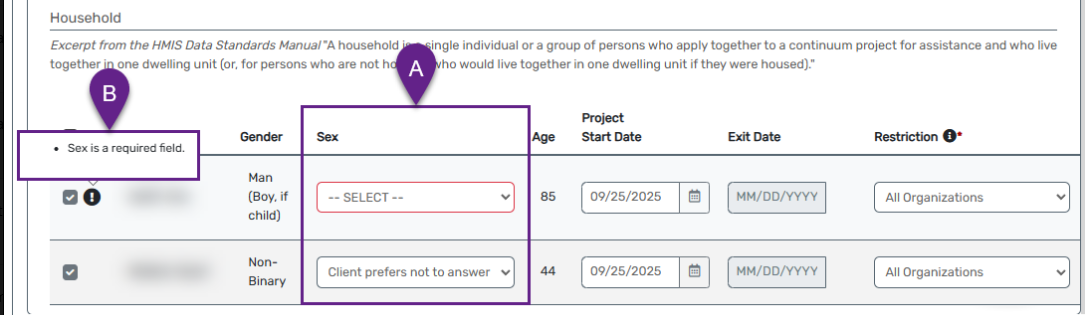
- Scroll down to the Household Section and check the box next to the household members you want to include in the enrollment. Change the project start date if needed.

-
Some federally-funded programs now require you enter your client's Sex at program enrollment (more information about this HUD mandated change here). If required, fill out the Sex category for your clients:
- Fill out each form within the workflow including the Universal Data Assessment, Barriers (if displayed), Domestic Violence Assessment, Income and Non Cash Benefits, and any remaining program specific assessments.
- Click Save when done.

If any Barrier is marked as “Indefinite = Yes,” the Disabling Condition field must also be “Yes.”
- Repeat steps 6-7 for each household or family member.
Some assessments will only show up for certain people (like the Head of Household or adults only).
- After finishing all household members, click Finish to complete the Intake.

Important! If you leave the workflow without clicking Finish, it could cause data problems.